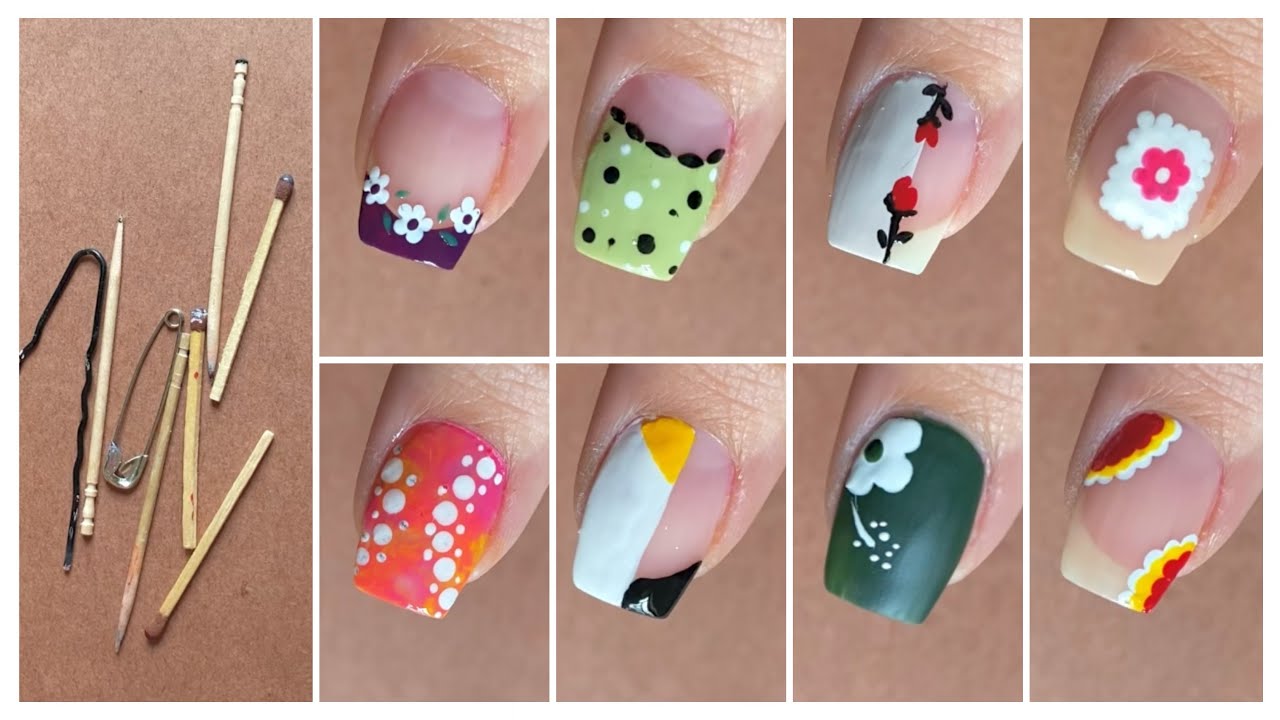
Who doesn’t want well-groomed and beautiful nails? Aren’t you? But how do you manage it? Of course, regular salon visits can be time-consuming and expensive and you are not a professional nail artist expert at nail arts. The good news? You don’t need to be a professional to achieve stunning nails at home. With a little patience, the right tools, and a few simple tricks, you can create DIY nail art designs for beginners that look just as good as a professional manicure.
Whether you’re looking for easy nail art for beginners or want to try flower nail art at home, this guide will walk you through some of the best DIY ideas. No fancy equipment is needed—just a few nail polishes, household items, and a creative spirit.
1. Polka Dot Nails: The Easiest Nail Art for Beginners
If you’re just starting out with DIY nail art ideas, polka dots are the perfect place to begin. They’re simple, fun, and can be done with just a toothpick or the end of a bobby pin.
How to Do It:
- Apply a base color and let it dry completely.
- Dip a toothpick or the rounded tip of a bobby pin into a contrasting nail polish color.
- Gently dot it onto your nails in a random or patterned design.
- Finish with a clear top coat for a smooth look.
This design works well with any color combination—black and white for a chic vibe, pastels for a soft look, or bright neon for something bold.
2. Ombre Nails: A Trendy Yet Simple Look
Ombre nails might look difficult, but with a simple makeup sponge, you can create a beautiful gradient effect at home.
What You Need:
- Two or three shades of nail polish that blend well together
- A small piece of a makeup sponge
- Clear top coat
Steps:
- Paint your nails with the lightest shade as a base and let it dry.
- On a sponge, apply two stripes of polish (one light, one dark) slightly overlapping.
- Dab the sponge onto your nails, blending the colors together.
- Repeat until you achieve the desired gradient effect.
- Clean up around the nails with a cotton swab dipped in nail polish remover, then apply a top coat.
This is an ideal easy nail art for beginners because it’s forgiving—even small imperfections look intentional and artistic.
3. Flower Nail Art at Home: Delicate and Feminine
Floral nail designs always look elegant, and the best part is that they’re much easier to do than they seem.
Simple Floral Design Steps:
- Apply a light or pastel-colored base coat.
- Dip a toothpick into a nail polish color of your choice and make five small dots in a circular pattern to form flower petals.
- Add a dot of a different color in the center of the flower.
- Let it dry completely before sealing with a top coat.
If you want a more detailed look, use a fine nail art brush to add leaves or vines around the flowers.
4. Marble Nails: A Luxurious Look with Minimal Effort
Marble nails give an expensive, salon-like effect but are surprisingly easy to do at home with a water marbling technique.
How to Create Marble Nails:
- Fill a small bowl with room-temperature water.
- Drop a few different nail polish colors into the water and use a toothpick to gently swirl them together.
- Dip your nail into the design, keeping it submerged while removing excess polish from the surface with a toothpick.
- Lift your finger and let the design dry before applying a top coat.
Marble nails look particularly stunning with neutral shades like white, gray, and black, but you can experiment with any colors you love.
5. Striped Nails: A Sleek and Modern Look
Stripes are a great way to add a modern and polished touch to your nails, and they can be done using simple household items like tape.
How to Get Perfect Stripes:
- Paint your nails with a base color and let them dry completely.
- Use thin strips of scotch tape to create straight lines across your nails.
- Apply a second polish color over the taped areas.
- Carefully remove the tape while the polish is still wet.
- Let it dry and finish with a clear top coat.
For a minimalistic look, try nude and gold stripes. For something bold, go for high-contrast colors like black and red.
Final Tips for a Flawless DIY Manicure
- Always start with clean nails. Oils and old polish can prevent new designs from adhering properly.
- Use thin coats. Thick polish layers take longer to dry and are more likely to smudge.
- Seal your design. A high-quality top coat keeps your artwork intact and adds shine.
- Be patient. The best nail art takes time, so don’t rush the process.
Conclusion: Creativity at Your Fingertips
Mastering DIY nail art ideas doesn’t require expensive tools or professional skills—just a bit of creativity and practice. Whether you’re experimenting with easy nail art for beginners, trying out flower nail art at home, or going for trendy ombre and marble effects, there’s a design for everyone.
Next time you’re in the mood for a fresh manicure, skip the salon and have fun creating your own stunning DIY nail art designs for beginners at home. The best part? You can change it up anytime, try new patterns, and make it your own.
