Introduction to Plastering Repair Work
Plastering is an essential component of construction and home maintenance, providing a smooth and durable surface for walls and ceilings. Over time, plaster may deteriorate due to moisture, impact, or structural movement, leading to cracks, holes, or flaking. Plastering repair work restores these surfaces to their original condition, ensuring both aesthetic appeal and structural integrity.
Common Causes of Plaster Damage
Understanding the reasons behind plaster damage helps in identifying the right repair methods. Some common causes include:
- Moisture Penetration: Excess humidity or water leakage weakens plaster, leading to peeling or crumbling.
- Structural Movement: Buildings naturally settle over time, causing cracks in plastered walls and ceilings.
- Impact Damage: Accidental bumps, furniture movement, or wall fixtures can cause dents and holes.
- Poor Initial Application: Improper plastering techniques or substandard materials result in weak adhesion and cracks.
- Aging and Wear: Older homes often experience plaster degradation due to long-term exposure to environmental conditions.
Tools and Materials Required for Plastering Repair
Effective plastering repair work requires the right tools and materials, including:
- Plaster mix (gypsum or lime-based, depending on the repair type)
- Joint compound or filler
- Plastering trowel and hawk
- Putty knife
- Sandpaper or sanding block
- Paint primer and finishing paint
- Water spray bottle (for dampening surfaces)
- Protective gear (gloves, mask, safety goggles)
Step-by-Step Guide to Plastering Repair Work
1. Assessing the Damage
Before starting, examine the extent of plaster damage. Identify whether it’s a minor crack, a deep hole, or widespread deterioration. This assessment determines the repair technique needed.
2. Preparing the Surface
A clean and stable surface ensures proper plaster adhesion. Remove any loose plaster using a putty knife or chisel. For deep holes, undercut the edges slightly to create a firm bonding area. Use a damp cloth or spray bottle to moisten the surface, preventing the existing wall from absorbing moisture from the new plaster.
3. Mixing the Plaster
Follow the manufacturer’s guidelines to prepare a suitable plaster mix. Typically, a thick, smooth consistency without lumps ensures easier application. Pre-mixed joint compounds work well for minor repairs, whereas traditional plaster is ideal for larger areas.
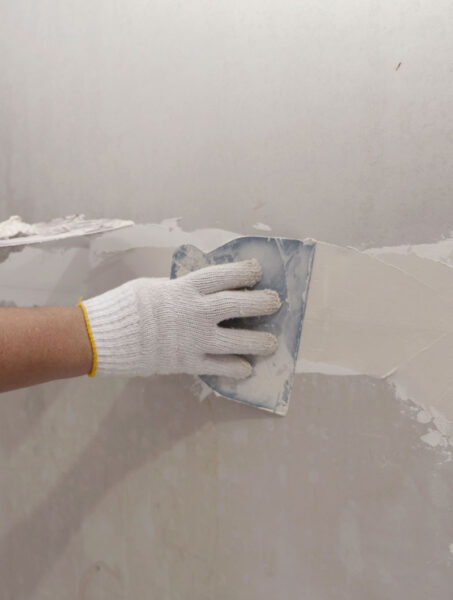
4. Applying the Plaster
For small cracks, use a putty knife to fill the gap with joint compound, smoothing it out to blend with the surrounding surface. For larger holes, apply the plaster in layers, allowing each coat to dry before adding the next. Use a trowel to level the surface, ensuring an even finish.
5. Smoothing and Sanding
Once the plaster is dry, sand the area gently using fine-grit sandpaper. This step removes imperfections and blends the repaired section with the existing wall. Wipe away dust before proceeding to the final finishing stage.
6. Painting and Finishing
To achieve a seamless look, apply a primer before painting. The primer enhances adhesion and prevents color discrepancies. Once dry, apply the finishing paint to match the surrounding wall, restoring its aesthetic appeal.
Specialized Techniques for Different Types of Plaster Damage
Hairline Cracks
For thin cracks, use a flexible filler or joint compound. Apply with a putty knife and smooth it out. Once dry, sand lightly and repaint.
Deep Cracks and Large Holes
Larger cracks require multiple layers of plaster. Reinforce deep cracks with mesh tape before applying plaster to prevent future separation.
Water-Damaged Plaster
Identify and fix the moisture source before repairing water-damaged plaster. Cut out the weakened section, replace it with new plaster, and seal it with a water-resistant primer before painting.
Preventing Future Plaster Damage
Preventative maintenance enhances plaster durability. Some key measures include:
- Controlling Humidity: Use dehumidifiers or ventilation to minimize moisture buildup.
- Addressing Structural Issues: Fix foundation problems or excessive movement to prevent recurring cracks.
- Proper Installation: Use high-quality plaster materials and follow best application practices.
- Protecting Walls: Avoid impact damage by positioning furniture carefully and using protective wall coverings in high-traffic areas.
Cost of Plastering Repair Work
The cost of plaster repair varies based on the damage extent and materials used. Minor cracks and small patches may cost between $50 to $200 for DIY repairs. Professional services range from $300 to $1,000, depending on complexity and labor requirements.
When to Hire a Professional
While small repairs are manageable with DIY techniques, professional expertise is advisable for extensive damage, intricate decorative plasterwork, or historical restorations. Experts ensure long-lasting repairs with superior finishing quality.
Conclusion
Plastering repair work is a crucial aspect of home maintenance, restoring damaged surfaces while enhancing structural stability. By understanding common issues, using the right materials, and following proper repair techniques, homeowners can effectively fix plaster problems. Preventative measures further prolong plaster durability, reducing the need for frequent repairs. Whether opting for DIY repairs or professional assistance, timely intervention ensures well-maintained, aesthetically pleasing walls and ceilings.