Water and electronics are never a good mix—especially when that electronic is your iPhone. Whether your device took a dive in the sink, got caught in the rain, or landed in a puddle, water damage can feel catastrophic. The good news? All hope is not lost. If you act quickly and follow a careful, step-by-step process, there’s a decent chance your iPhone can be revived.
In this detailed guide, we’ll walk you through everything you need to do—from the immediate response to repair options—to fix your water-damaged iPhone safely and effectively.
Understand the Signs of Water Damage
Before jumping into solutions, it’s important to identify whether your iPhone is actually water-damaged. Some signs are obvious, while others are more subtle.
Visible Signs
- Water inside the screen or camera lens
- Fogging under the glass
- The device won’t turn on
- Sound is distorted or non-functional
- Buttons or the touchscreen become unresponsive
Hidden Indicators
Every iPhone comes with a Liquid Contact Indicator (LCI), located in the SIM card slot. Normally white or silver, this strip turns red when it comes in contact with moisture. If your iPhone is showing some irregular behavior and the LCI is red, you’re dealing with water damage.
Step 1: Turn Off the Device Immediately
The moment you realize your iPhone has been exposed to water, power it down right away. This step is critical. Water conducts electricity, and keeping the phone on can short-circuit internal components.
If your screen is still responsive, hold the power button and slide to power off. If it’s unresponsive, don’t attempt to charge or force restart it—that can do more harm than good.
Step 2: Remove Accessories and SIM Card
Disconnect all cables, remove any case or screen protector, and take out the SIM card and tray. These areas are prone to trapping moisture, and you want to expose as much of the phone’s surface to air as possible. Use a soft, lint-free cloth to gently dry the phone externally, especially around openings like the charging port and headphone jack.
Step 3: Avoid Common Myths
Many iPhone users panic and rush to the internet for quick fixes. Unfortunately, some common suggestions can actually worsen the damage.
- Don’t put your iPhone in rice. While this myth is widespread, rice doesn’t effectively absorb moisture and can leave dust or starch inside your device.
- Don’t use a hairdryer or heat gun. High heat can damage internal components and warp the frame.
- Avoid shaking the phone. This can spread water further inside, affecting more components.
Stick to gentle and proven drying methods.
Step 4: Use a Desiccant Pack
If you want to absorb the moisture from your iPhone more effectively, silica gel packets are your best bet. These are the small, bead-filled packs often found in new shoe boxes or electronics packaging. Place your phone in an airtight container with several of these packets and let it sit for at least 24 to 48 hours.
If you don’t have desiccants, leaving the iPhone in a dry room with good air circulation is the next best option. A fan blowing gently across the phone can help evaporate residual moisture.
Step 5: Wait Before Powering It Back On
It’s tempting to check whether your iPhone still works, but patience is key. Turning on the device too early can cause irreversible damage. Give your phone a full two days to dry out completely.
After 48 hours, insert the SIM card and attempt to power it on. If the screen remains dark or the phone behaves erratically, further action is needed.
Step 6: Assess Functionality
If your iPhone turns on, you’re not out of the woods just yet. Take time to check all major functions:
- Touchscreen: Is it responsive? Any ghost touches?
- Speakers and Microphone: Can you hear and speak clearly?
- Charging Port: Does it charge without issues?
- Cameras: Are the images clear and focused?
- Buttons: Are they responsive or sticky?
If any of these features are glitchy or not working, internal corrosion may already be taking effect. At this point, professional help is recommended.
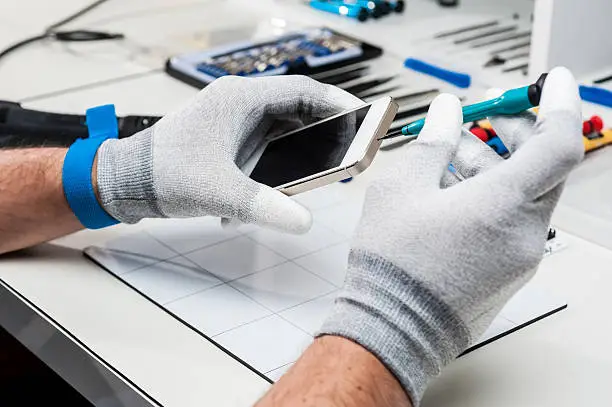
Step 7: Visit a Professional Repair Technician
If drying your phone hasn’t fully resolved the issue, the next step is to consult a repair specialist. Trained technicians can open the iPhone safely, clean corrosion with specialized tools, and replace damaged parts if necessary. This is especially important for newer iPhones, where complex internal designs make DIY repairs risky.
Looking for trustworthy Cell Phone Repair services in North Miami? A certified technician can make the difference between a permanently damaged phone and a fully functional one.
Step 8: Data Recovery Options
If your iPhone refuses to turn on or you’re concerned about data loss, don’t panic. Many repair centers offer data recovery services. The earlier you bring your phone in, the better the chances of retrieving contacts, photos, messages, and other valuable data.
Even if your iPhone is beyond saving, technicians may be able to extract your information directly from the storage chip or use external hardware to back up the data.
Step 9: Learn How to Prevent Water Damage
Preventing future mishaps is just as important as fixing your current problem. Here are some helpful habits:
- Invest in a waterproof case, especially if you’re near water often.
- Avoid using your phone in the rain or near pools, sinks, or tubs.
- Store your phone in a sealed pouch during beach trips or outdoor adventures.
- Be mindful of humidity, as steam from hot showers can also cause water damage over time.
Even if your iPhone model claims to be “water-resistant,” no phone is truly waterproof. Over time, seals degrade, and small cracks can let moisture in.
Step 10: Consider Apple Warranty or Insurance
AppleCare+ covers accidental damage, including water damage, for a service fee. If your device is relatively new and covered, you may be eligible for a replacement at a reduced cost.
Alternatively, third-party insurance plans like Asurion and SquareTrade also offer water damage coverage. Filing a claim may be more cost-effective than paying for repairs or purchasing a new device out-of-pocket.
Just be aware that any unauthorized repair attempts may void your warranty. Always weigh the risks before opening your device yourself.
Conclusion
A water-damaged iPhone doesn’t have to be the end of the world. With prompt action, a proper drying method, and, when necessary, the help of a skilled technician, you have a real chance of bringing your phone back to life. Whether you dropped it in the sink or got caught in an unexpected downpour, the steps above provide a reliable roadmap to recovery.
Act quickly, avoid the rice trap, and don’t hesitate to call in the pros if things go south. After all, your iPhone is more than just a gadget—it holds your memories, conversations, work, and entertainment in one powerful package.
At Mobile Xpert North Miami, we specialize in all types of cell phone repair, including screen replacements, battery fixes, and charging port issues. Our team services various brands and models, ensuring a quick and efficient repair process.
Visit our cell phone store today for professional phone repair solutions. We offer same-day service, competitive pricing, and a warranty on all repairs to give you peace of mind.
click here to visit website for more interesting collection of articles