Scaffolding plays a vital role in modern construction projects, enabling workers to perform tasks safely at elevated heights. However, scaffolds can also pose serious hazards if not properly managed. This is where risk assessment for scaffolding becomes essential. Conducting a structured risk assessment ensures that potential dangers are identified, evaluated, and controlled before they can lead to accidents. By following a clear step-by-step process, construction managers, safety officers, and workers can reduce risks while maintaining efficiency. A well-prepared assessment not only complies with legal requirements but also safeguards workers, equipment, and project timelines. In this guide, the process of scaffold risk assessment is broken down into practical steps that can be implemented on any construction site.
Understanding Scaffold Risk Assessment
Before beginning the step-by-step process, it is important to understand what a scaffold risk assessment involves. It is a systematic examination of all potential hazards associated with scaffolding, from installation to dismantling. The assessment aims to identify risks such as falls, structural collapse, falling objects, or unsafe access routes. Once hazards are identified, measures are put in place to either eliminate or minimize them. This process is not just about paperwork—it ensures safety and prevents costly accidents.
Step 1: Identifying Hazards
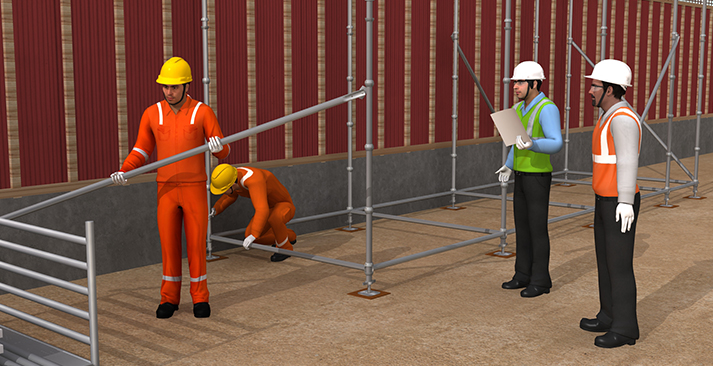
The first step is recognizing the specific hazards that scaffolding might present on a site. These hazards can vary depending on the type of scaffold, the height, the working conditions, and environmental factors. For example:
- Falling from unguarded platforms
- Scaffold collapse due to poor erection or overloading
- Slippery surfaces caused by weather conditions
- Falling tools or materials striking workers below
By carefully observing and evaluating the site, managers can compile a list of all possible hazards before work begins.
Step 2: Evaluating the Risks
Once hazards are identified, the next step is to evaluate the level of risk associated with each one. This involves considering:
- The likelihood of the hazard occurring
- The severity of potential harm if it does occur
- The number of workers who may be exposed
For instance, a scaffold built near overhead power lines poses a severe risk of electrocution. Evaluating risks helps determine which hazards require immediate action and which can be managed with simple precautions.
Step 3: Implementing Control Measures
After evaluating risks, control measures must be introduced to reduce or eliminate them. These measures should follow the hierarchy of control:
- Elimination: Removing the hazard entirely, such as avoiding scaffolds in areas with unstable ground.
- Engineering Controls: Installing guardrails, toe boards, or debris nets.
- Administrative Controls: Training workers on safe scaffold use and enforcing safety policies.
- Personal Protective Equipment (PPE): Providing helmets, harnesses, and non-slip footwear.
Each site may require a combination of these measures, depending on the conditions and type of scaffold used.
Step 4: Recording the Assessment
A documented scaffold risk assessment is a legal requirement in many regions. Recording the findings ensures accountability and provides a reference for all workers. The record should include:
- Details of identified hazards
- The risks linked to each hazard
- The control measures applied
- The individuals responsible for ensuring implementation
Keeping this documentation updated is essential, especially if site conditions change or new hazards arise.
Step 5: Monitoring and Reviewing
Risk assessment for scaffolding is not a one-time task—it must be regularly reviewed. Construction sites are dynamic, and conditions often change. A scaffold that was safe yesterday might become unsafe today due to weather, wear, or modifications. Regular inspections should be carried out to monitor the effectiveness of control measures. If a new hazard is discovered, the assessment should be updated accordingly.
Step 6: Worker Involvement
Engaging workers in the risk assessment process makes it more effective. Workers often notice hazards that managers might overlook because they are directly involved in daily scaffold use. Encouraging them to report unsafe conditions and participate in discussions helps create a strong safety culture on site.
Step 7: Training and Communication
A risk assessment is only useful if everyone understands and follows it. Training sessions should be organized to explain:
- How to use scaffolds safely
- The importance of wearing PPE
- Steps to take in case of emergencies
Clear communication ensures that every worker is aware of potential hazards and the measures in place to address them.
The Importance of Regular Inspections
Even after completing all steps, regular scaffold inspections remain a crucial part of safety. Inspections should be carried out:
- Before scaffolding is first used
- At regular intervals (such as weekly)
- After any significant alterations or severe weather
These checks help detect issues like loose connections, damaged planks, or missing guardrails before they cause accidents.
Fox Scaffold Design
Fox Scaffold Design specializes in creating safe, reliable, and efficient scaffold solutions tailored to construction needs. By incorporating expert planning, structural calculations, and compliance with safety standards, the company ensures scaffolds are designed to minimize risks from the very start. Their approach aligns with every step of scaffold risk assessment, from hazard identification to regular inspections, making projects safer and more efficient. With Fox Scaffold Design, construction teams can focus on productivity while knowing that safety has been built into the structure itself.